I Attempted a Chocolate and Orange Braided Bread
Things did not go smoothly, but it was worth it.
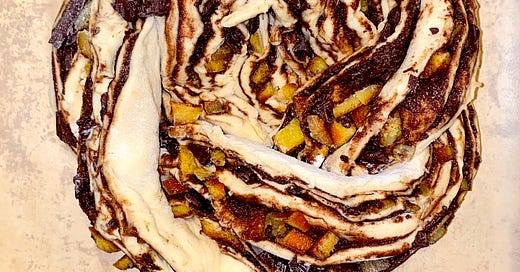
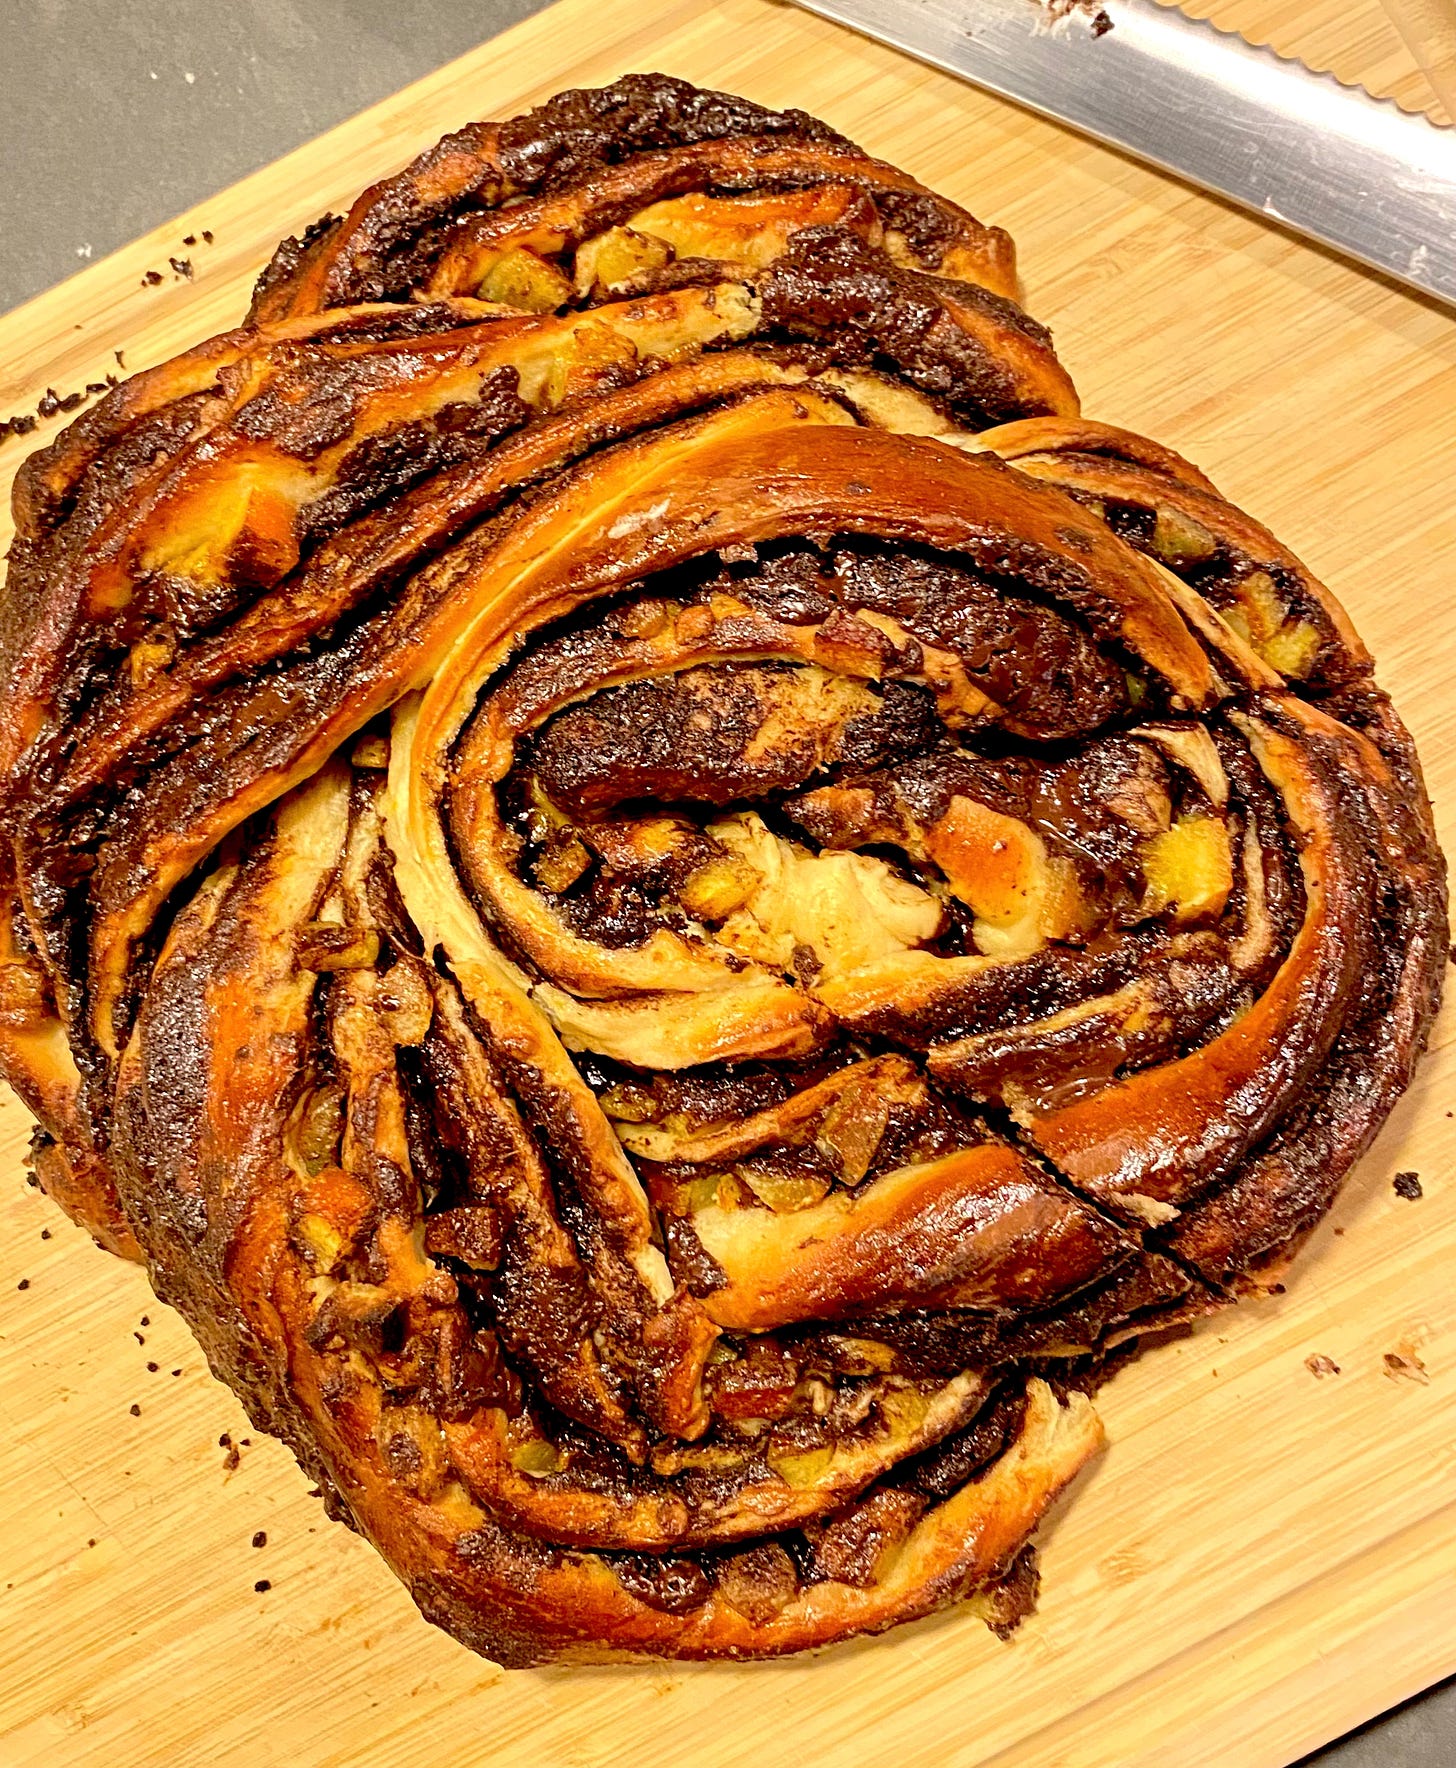
I’d had my eye on a Whole Wheat, Chocolate, and Orange Braided Bread from Norwegian Baking Through The Seasons by Nevada Berg ever since I purchased the book last Spring. Streaked with chocolate and coiled up into a tight circle, this Grov-flettekrans med skjokolade og kandiserte appelsinskall resembles a Jewish babka in the fetal position (which is much more appealing than it sounds).
I had never summoned the courage or stamina to attempt braided bread, let alone a braided bread that requires a two-day candied orange peel situation. Still, every time I leafed past the bread’s seductive photo, I would stare for a few beats and pledge to make it when the time was right.
Well, the time was finally right. First order of business was making candied orange peel. It wasn’t particularly hard — just boiling strips of orange peel in sugary water, broadly speaking — but it did require two days of open-air drying out, which had me paranoid that a militia of ants would find them and cause widespread chaos. I guess that’s just PTSD from a childhood in the Northeast.
After chopping up the orange strips, it was then time for the main event: dough. I am not a bread baker; so anytime I enter this space, it’s a bit fraught. For good reason - I had drama right from the get go.
The first simple steps had me melt butter in a saucepan, then add milk, and then pour the mixture, once lukewarm, into a stand mixer with the dough hook attached. Next, just add some flour, sugar, cardamom, yeast, and orange zest. Knead for eight minutes. Great! What a simple, foolproof opening stanza for this dough. Surely no one could mess that up.
In an effort to be efficient, however, I thought I would be clever and add the dry ingredients to the bowl first while the butter was melting. Saving time, saving stress. What a magnificent day to be making Norwegian bread!
When the milk mixture was ready, I poured it into my dry ingredients and put my kneading hook to work. I just had to wait eight swift minutes. But when the timer beeped, I checked in on what would surely be a perfect dough, only to find it impossibly wet. This was not something I could form into a ball. Something was wrong. How could I have possibly botched this?
Well, dear people, let me tell you. There are two types of Kitchen-Aid stand mixers out there in the world: the Tilt Head and Bowl Lift. The Tilt Head has users literally tilting the upper portion of the machine up and back — like lifting a trunk — to access the bowl. The Bowl Lift, however, does not tilt backwards. Instead, the bowl is placed on little arms that users then raise up into the machine.
I, regrettably, have the Bowl Lift, which I’ve come to dislike. Pouring ingredients into the bowl is awkward — even after you’ve lowered the bowl down and away from the motor. Dump your stuff too close to the bowl, and a third of it winds up on the machine. Pull back a few inches and now your ingredients are on the counter. I usually have to employ some sort of plastic collar on the bowl to help with spills, which makes the whole thing look like a dog that just got back from the vet.
Another downside to the Bowl Lift? On occasion — not often, but on occasion — one can forget to hoist the bowl back up into its mixing position. This will often happen with large batters because they can give the illusion that your Kitchen-Aid paddles and hooks are properly submerged into the bowl when in fact…. they are not.
In other words, I forgot to lift the bowl into proper position, which meant that after eight minutes, only the top third of the mixture had been kneaded, leading to a very wet and soupy dough. It didn’t help that by adding the dry ingredients first, the flour and yeast and sugar and such were just sitting in the nadir of the bowl while the milky business was getting whipped around uselessly above.
This was user error in its most blatant form. I did my best to excavate the dry ingredients from the depths and then returned my bowl to the correct position in the mixer. As I let the dough hook samba its way through the mixture, I now was full of apprehension. Bread is so finicky — had I already messed this up beyond repair? Should I start over? Was I making the gluten mad?
In a display of bravery and great moral character, I decided to forge on. I would let the machine knead the dough until it was the sort of texture that seemed right. Annoyingly, this did take a little while because I had to repeatedly go back in and scrape up more dry ingredients from the bottom. Learn from me people: the sequence is laid out for a reason. Wet first, dry second.
Eventually the dough felt like dough; so I transferred it to a greased bowl, covered with a tea towel, and let it rise for an hour. Then it was time to make the chocolate paste that would weave its way through the loaf. The process was shockingly simple: mix cocoa powder, sugar, melted butter, and cardamom — yes, more cardamom — together in a bowl. Naturally I dipped my finger into the paste and oooh, what an interesting flavor. Not terribly sweet, and the cardamom was a lovely surprise. I was getting excited to see how this would all work out.
After an hour, it was time to check on the dough. Had it doubled in size? I don’t know. I’m really bad at estimating sizes and distances and dimensions. For all I knew, it was five times as large. But as best as I could tell, we had achieved doublage. Now came the fun part.
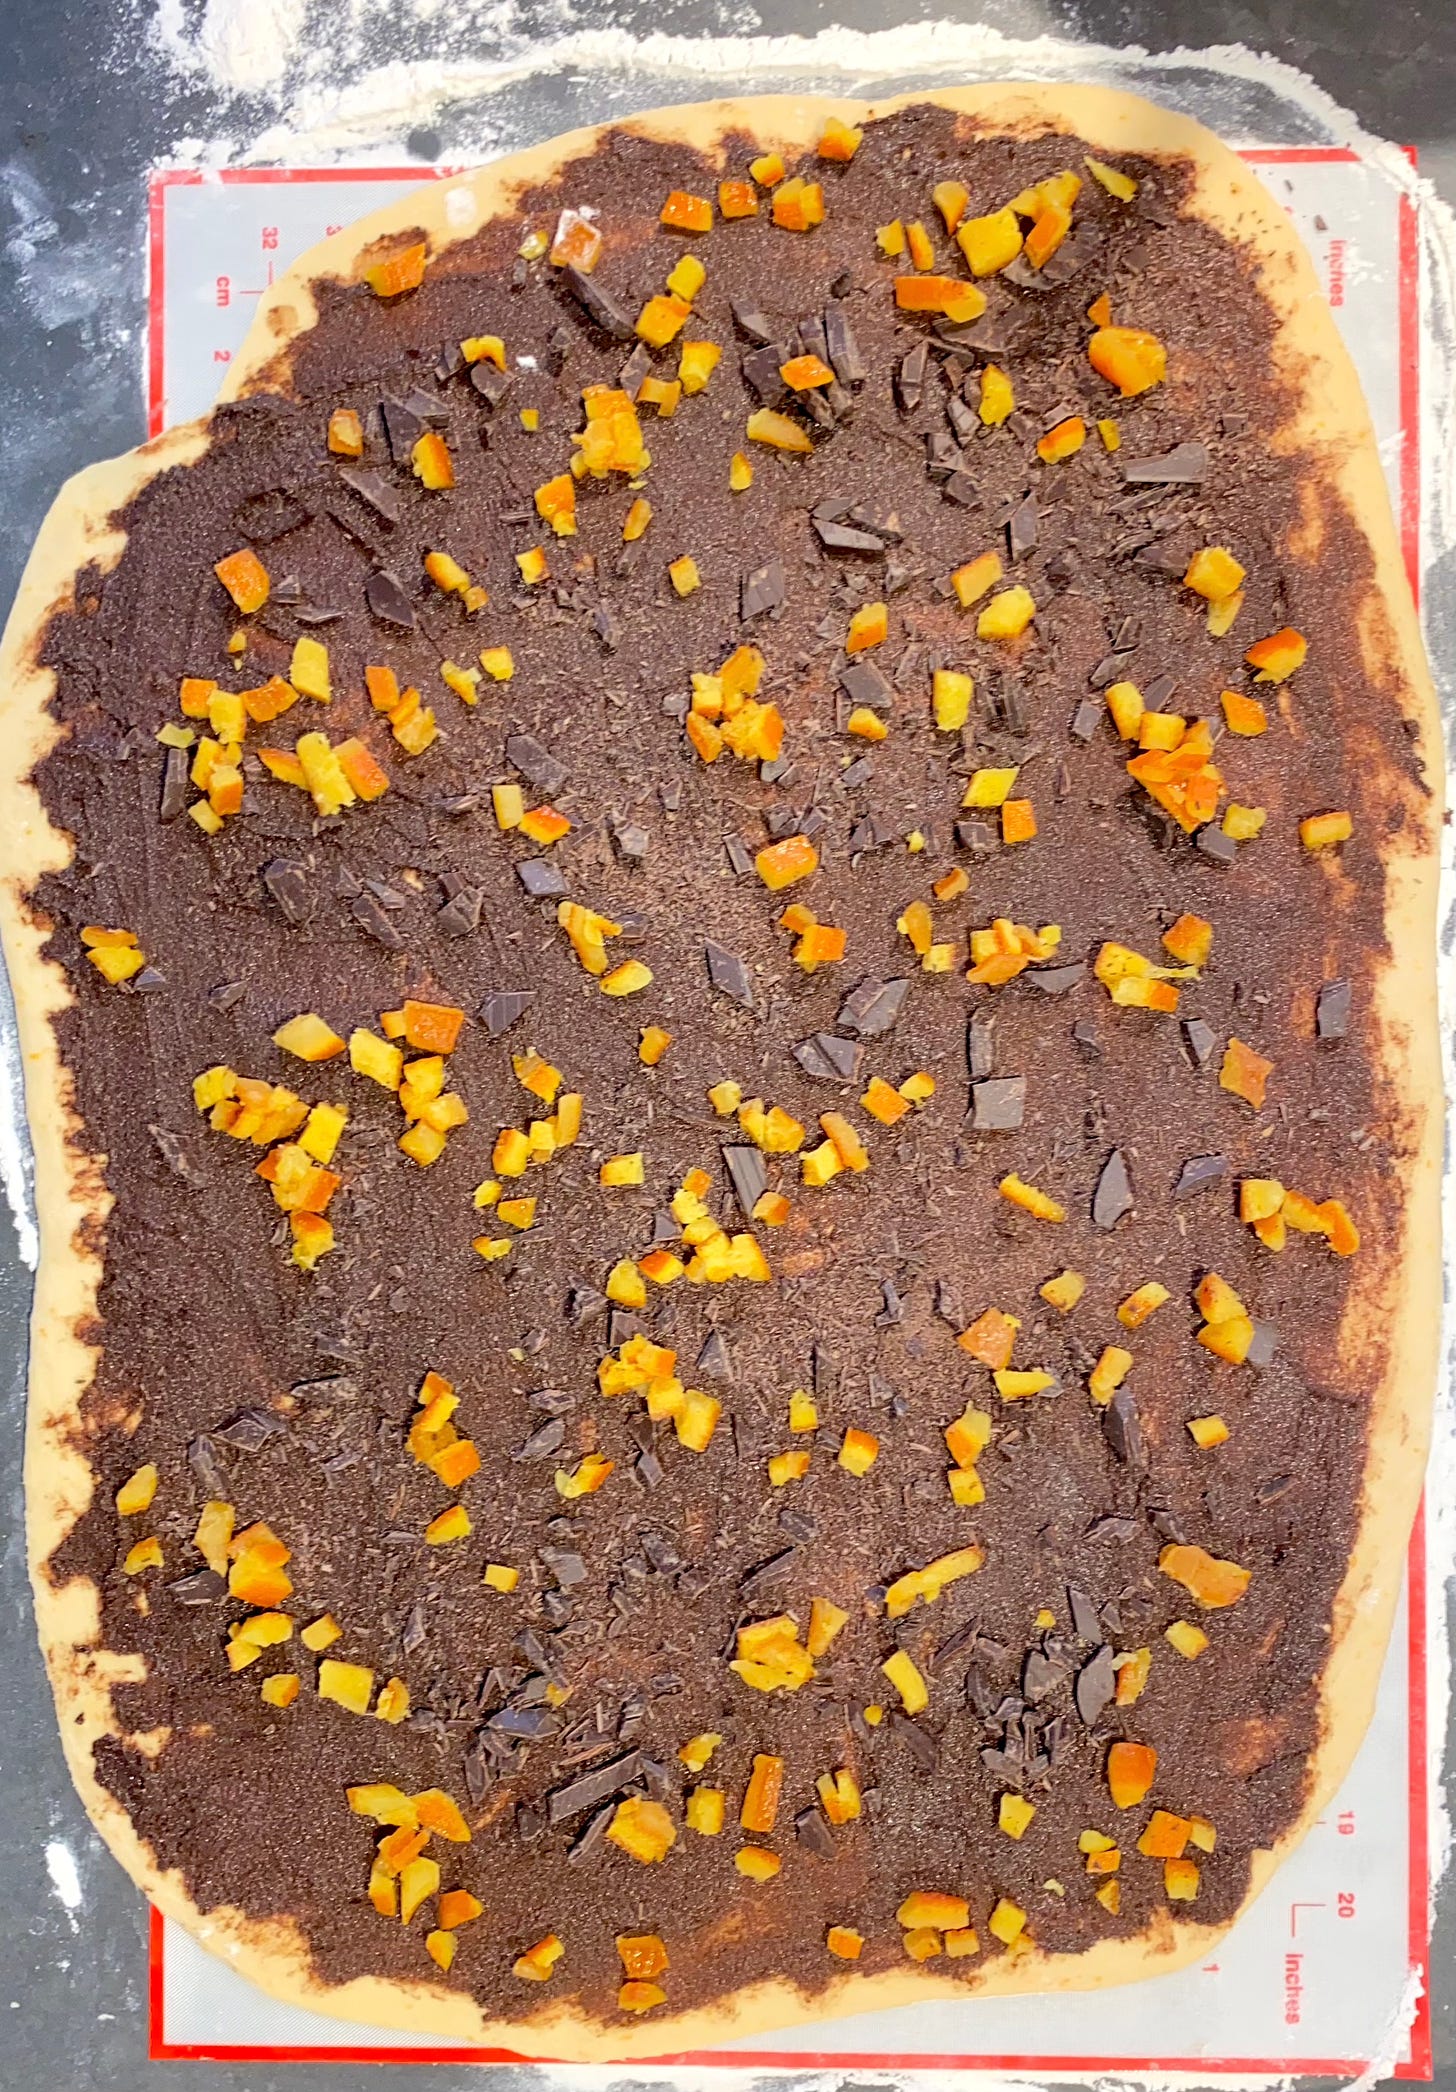
I chopped the dough in half and rolled one section out into a vaguely rectangular 18x22” shape (this is where my silicone pastry mat proved invaluable for measuring). Next I needed to spread half the chocolate paste across the dough, all the way to the edges. Easier said than done. The paste was very pasty, which is very on brand for paste. This meant that spreading it with a spatula was tricky — the paste either stood its ground, or it just attached itself onto the spatula and refused to let go. Ultimately I had to take matters into my own hands — quite literally.
With care but also authority, I pressed my fingers into the chocolate paste and coaxed it across the dough, encouraging it to spread all the way to the edges. I didn’t think there would be enough to cover the entire rectangle, but I simply repeated swirling motions, thinning out the chocolate with every pass. It was undeniably very sensual. Imagine the pottery scene from Ghost, and then replace the clay with chocolate paste, Demi Moore with me, and Patrick Swayze with… well… the analogy can only go so far.
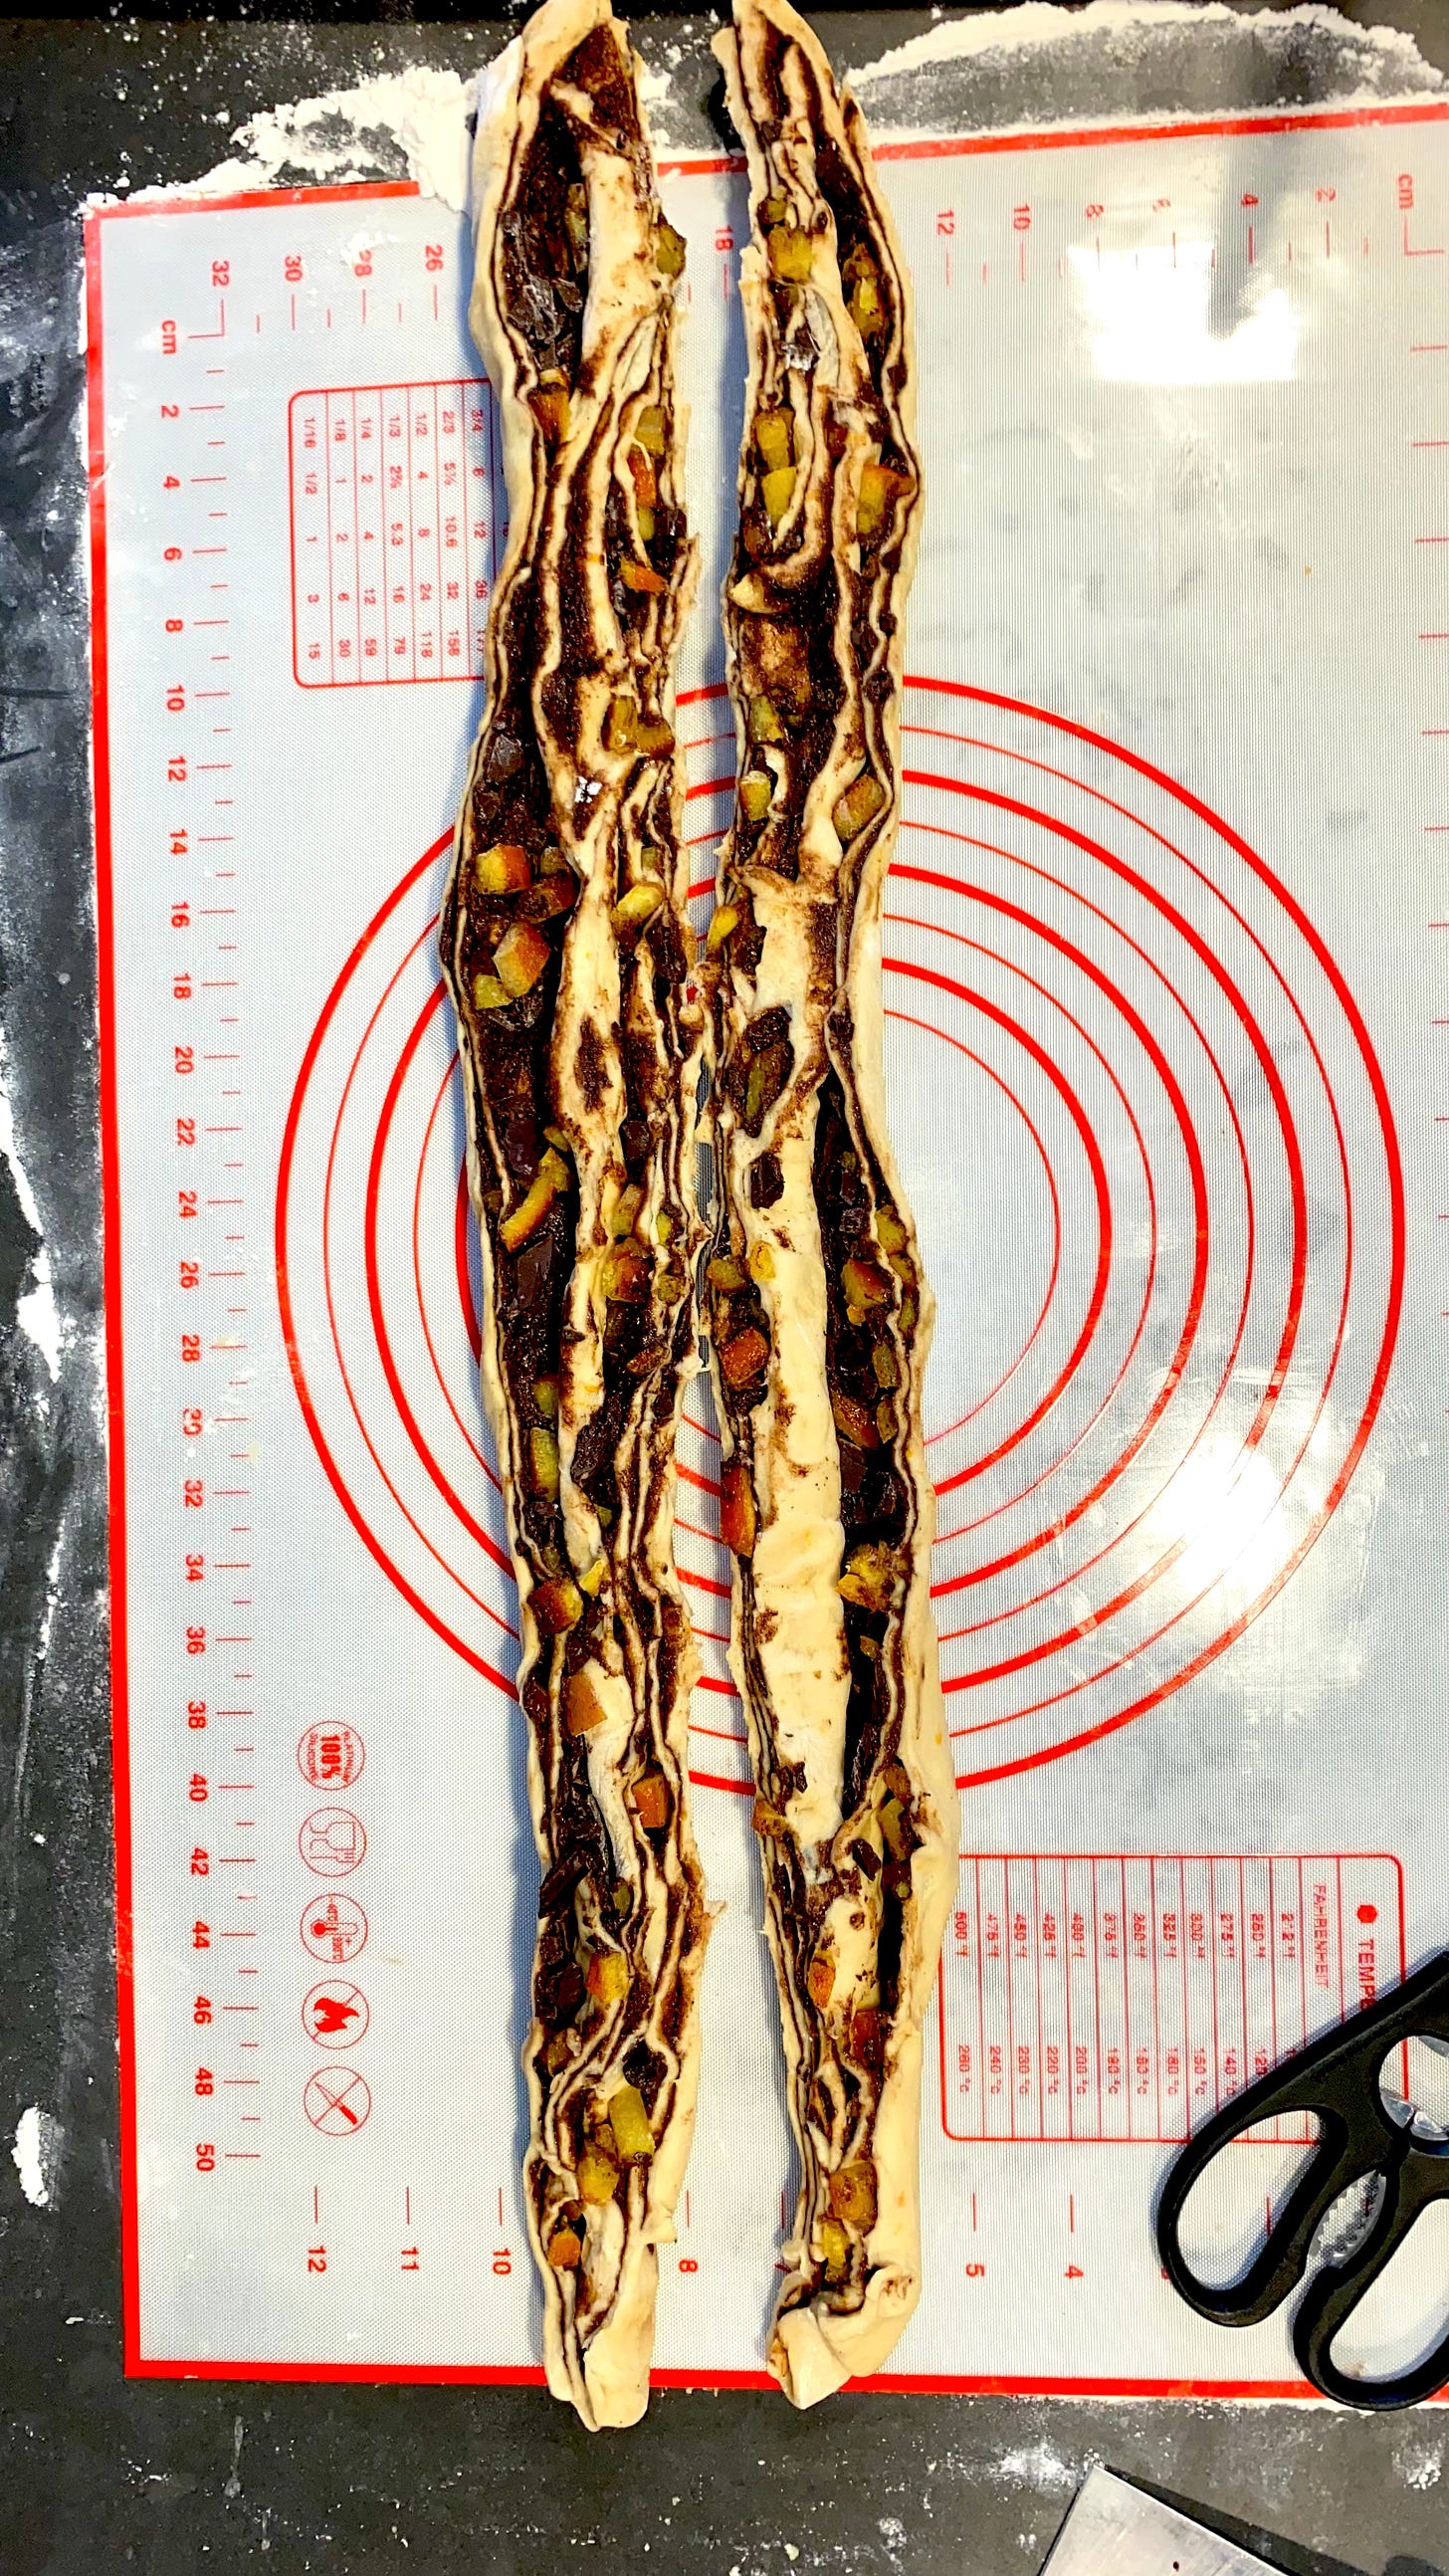
Moving on. With the chocolate finally slathered all over the dough, I scattered chopped chocolate and half the candied orange peel pieces across it. Then — in perhaps the most fun and slightly stressful step of the recipe — I rolled the dough up into a girthy log and sliced it in half lengthwise. It was time to braid.
Since there were only two strands in this braid, the process wasn’t exactly complicated, but I still carried a good amount of fear that I would somehow do it wrong. Luckily and shockingly, I was able to form a double-helix of dough without any setbacks. After pinching the ends to keep the braids attached to each other, I then coiled the whole thing up like a snail shell. This left me with the bread’s final form: a twisty, hypnotic disk of chocolate and dough.
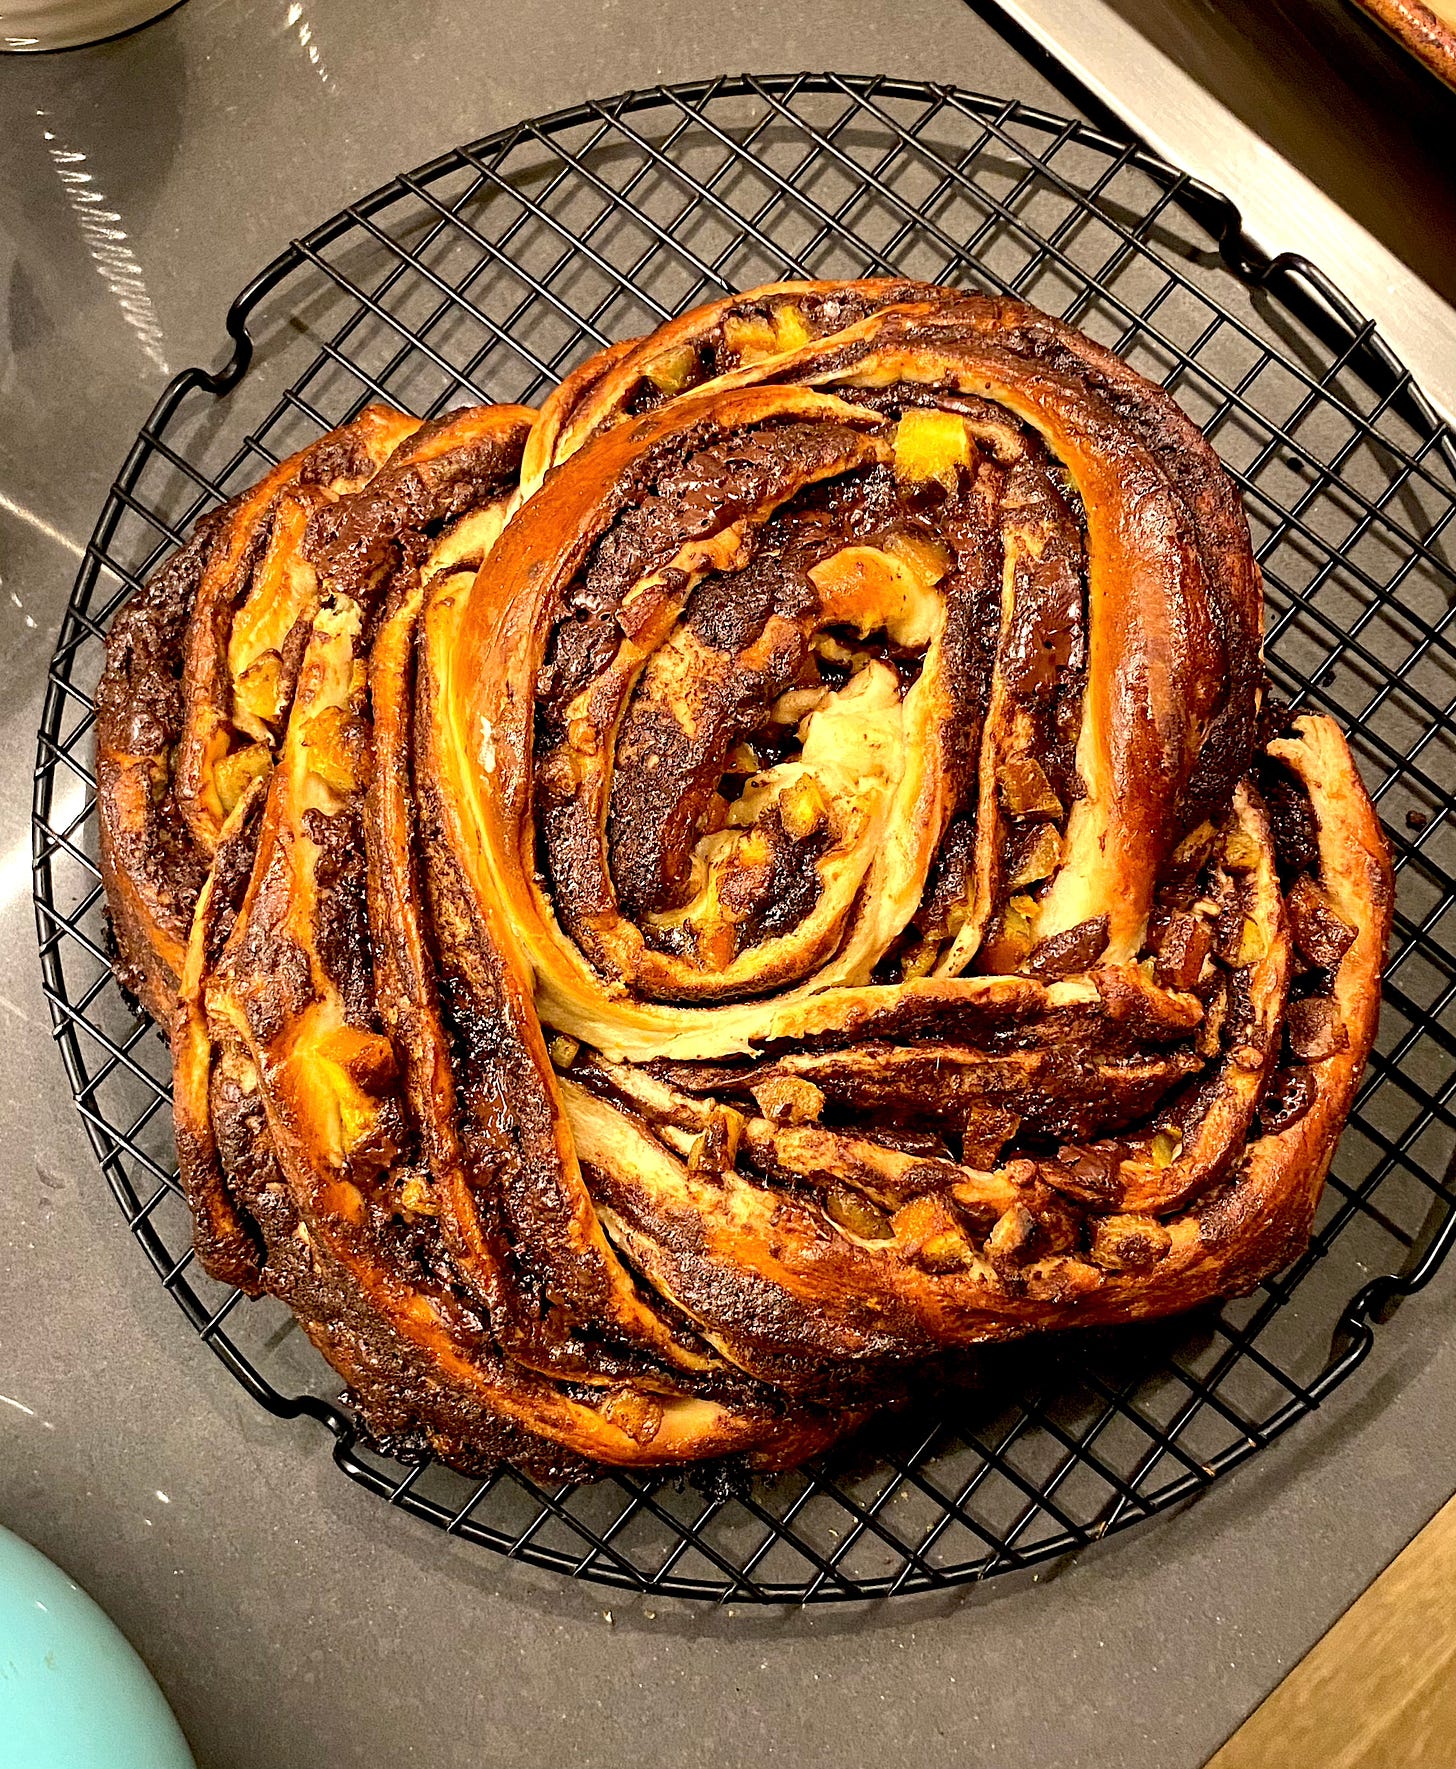
I then repeated alllll of this madness with the second half of the dough, concluding by brushing both rounds with some egg wash and inserting them into the oven. Half an hour later, I had two positively gorgeous loaves of chocolate orange bread. They were so enticing, so photogenic — I almost didn’t want to eat them in case their beauty belied a meh interior. But also, I am a slave to a chocolate-orange flavor combination; so there was no real chance I’d let this bread sit for more than 5 minutes undisturbed.
Oh my goodness — sensational. This was all I could want out of a chocolate bread. If my foibles with the stand mixer had disrupted the bread’s quality, I couldn’t tell. The textures were all on point, and the chocolate and orange were beautifully bound by the cardamom undertones. This was a success.
I wonder if there’s an easier way to approach the candied orange peel step. It’s not hard to make, but waiting 24-48 hours is annoying. Perhaps store-bought would be a decent work-around. Of course, there is a world where one skips the orange altogether. As a mere chocolate braided bread, this would still be mighty fine.
Plus, by skipping the orange, while I would be sacrificing my favorite chocolate combo, it also means I could actually make another one of these breads… right now. There’s no time like the present, they say. Wish me luck everyone. And this time: wet ingredients first.
Oh, and as luck would have it, I have a little video of me slicing into the bread, and I believe it conveys far more than any of these words and pictures do.:
The recipe, for those who missed it above, is here.
Have you made a braided bread before? What are some tricks you’ve picked up?





There's a feeling you get when you bake bread that's not like anything else; it's almost like you've created life itself. (People who actually have children may disagree with me on this.) Regardless, it looks amazing. Well done!
I love your style of writing. Your voice and comedic tone comes through effortlessly. It sounds like you want the power of Bowl Lift mixer with the ease of a Tilt Head. It may be time to treat yourself to the Bosch. It has dough making capabilities, can handle really large size batches and has a strong motor. For drying fruit peels, I have a food dehydrator that I use for my fruit drying needs - it can cut the time down significantly, but I think I've heard people say they use their convection ovens on a really low temp too. (Don't you just love the smell of citrus??) This looks so delicious; I think you are ready to fill out the Great British Bakeoff application!